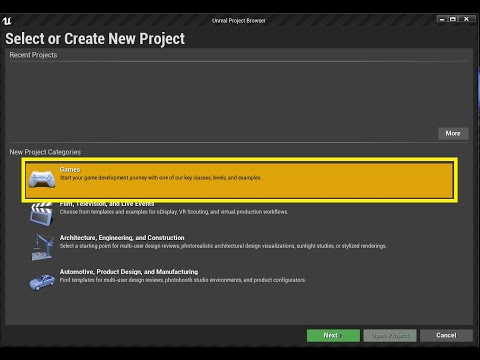
Dark's Unreal Tutorial Series - Part 01 (BP or C++) = Space Invaders Clone - Project Setup

The First Steps in making a Space invaders clone in UE4 Using Blueprints OR C++ This video begins both Options! This series will require no ...

Showing posts with label CPP. Show all posts

Tuesday, January 5, 2021

Dark's Unreal Tutorial Series - Part 04 (BP) = Space Invaders Clone - Player Ship Actor - Part A


This series will require no Art assets.
No previous knowledge required.

Please do comment below tell us what your thinking!

Join us on Discord!

A big thanks to all the Firebeard Family and Patrons for making me love what I do and do what I love!


So now we're going to take a look at the player's ship character.

We are going to create it using just some basic cubes.

Double Click BP_Player to open it.


You can adjust the perspective of the viewport and tool by dragging on the sidebars.


So Top Left corner Add Component.

We're going to type Cube.


This cube is a little on the big side.

we're going to constrain the proportions, so it can stay a cube and drag down the size to be a quarter.

Do this by locking that Scale of X, Y and Z.

Then click and drag on then to scale your cube up or down.


Then drag your cube up get a better placement on it.


We can adjust the speed that the Viewport moves around, like the camera we are controlling.

By holding down the Right Click and adjusting the mouse wheel, using W, A, S and D to test the speed.


We're going to duplicate this cube and put it to one side.

Once again using Copy (Ctrl + C) and Paste (Ctrl + V) for duplaction.


Then we're going to duplicate again but this time put it on the other side.


Once more duplicating the cube and placing it on top.


Once we've got these 3, it looks kinda like our Ships Character. 

It's close enough for now.

We are going to group all the cubes under the Parent Block, which is the first one we created.


Now I'm going to click on the Parent Block and press F2, you can also Right Click and click rename.

We are going to call this Ship.


Now we are going to need some way of sensing when we've been hit by one of the bombs from the enemy ships.

So click Add Component and search Box Collision.


W're going to move it so it looks right. 

It doesn't have to be absultly perfect, just has to be close enough.


Now we'll Compile and Save that.


What we are going to do now is create an event, Click on Event Graph 


The event will tell us when the Box Collider is overlapped by another object.

Right Click on our Box Collider mine is called Box.

Move over to the Add Event tab and look for OnComponentBeginOverlap


We're going to find out what the other object was by Casting to it.

So we are going to Cast directly to the Bomb.

Drag off the Other Actor node and search for Cast to BP_Bomb.

If the cast fails it goes out the bottom node if it doesn't then it come out of the top node.


All we are going to do here is destroy the Bomb.

Drag off the node As BP_Bomb and search for Destroy Actor.


When the Bomb hits that Character, we are also going to want to destroy the Character.

So we can just Copy and Paste the Destroy Actor and leave the Target Empty.


But before we can destroy the Character we're going to need an Explosion.

So we'll have to Spawn our Explosion effect.

Drag off the Destroy Actor node and search for Spawn Actor from Class.

Click on the Class drop-down menu and choose BP_Explosion.


Now obviously, we don't actually want the Explosion to be Spawned after we destroy the object we are in, because we wouldn't know what Transform to use.

So we are going to have to move deleting the Character until after we have created our instantiated Explosion.


Now we're going to drag off Spawn Transform node and search for GetActorTransform.

That should do it.


All we need to do now is Compile and Save.


Monday, January 4, 2021

Dark's Unreal Tutorial Series - Part 03 (BP) = Space Invaders Clone - Creating the Actors


This series will require no Art assets. 

No previous knowledge required. 

Please do comment below tell us what your thinking! 

Join us on Discord!  

A big thanks to all the Firebeard Family and Patrons for making me love what I do and do what I love! 


We're going to start by Right-Clicking on the Content Browser and we are going to create a New Folder to store our new Actors in.

We'll call it Actors for simplicity.


We're going to Rick Click again. 

This time we are going to the Blueprint Class.


Then we are going to choose Actor.

This is the first Actor we are going to make and not the last.

This one we are going to call BP_Player.


Next we are going to create another Actor.

This one we are going to call BP_Bomb.


We are going to create all the Actors we need for the game.

Then we will add bits to them to make them work.

This Actor is called BP_Missile.

 Which is the Players Missile, It goes up bomb comes down.


Another Actor is needed for the explosion at the end of those.

This one is called BP_Explosion.


We're also going to need an enemy Actor

Lets called  BP_Enemy.


We are also need a Barrier called BP_Barrier


So we have created all these reference. 

Hit the Save button on the Top Left.


Then we're just going to hit the Save All button at the end.


So that we've got declarations for each of the Actors in the game.

Setup and ready so we can get onto doing more of the more interesting stuff.

You can always come back and change the visual side of these things whenever the hell you like, to however you like.


Dark's Unreal Tutorial Series - Part 04 (BP) = Space Invaders Clone - Player Ship Actor - Part A

GB Dark's Unreal Tutorial Series - Part 02 (BP or C++) = Space Invaders Clone - Setting the Scene


The making of a Space invaders clone in UE4 Using Blueprints OR C++

This series will require no Art assets.
No previous knowledge required.

Please do comment below tell us what your thinking!

Join us on Discord!

A big thanks to all the Firebeard Family and Patrons for making me love what I do and do what I love!


So next we're quickly going to put together the scene that our games going to take place in the Unreal Engine.

So I'm just going to put together how I envisioned the game looking inside the scene

By using this basic block here.


I'll duplicate that and use it as a back wall.

I'm just going to go for a very simple setup.


You can use 'Q' 'W' and 'E' to swap between the different types of tools.

They are also accessible in the top right corner here.


More primitives in the menu on the left but I don't think we need those right now.

Just copying (ctrl + c) and pasting (ctrl + v) the bases gives us everything we need.


Next, we're going to Right Click in the Content Browser and create a new Blueprint.


This time we're going to make a Pawn.

It's going to represent our place in the world and give us access to the key inputs etc from the player.

I called mine IPlayer.


Another good use for this is to position our camera in the world.

So we're going to use Add Component in the top left corner.

We're going to add a Spring Arm.

This is going to give us a variable distance for centre to the camera.


We're going to set our length to 1200 for this because it's about right.


Then we're going to add a Camera by Adding Component again.


Compile that out and Save.


Then we're going to go back to the Game Mode.

If you haven't got it open you can go into the Content Browser and Double Click it.


We're going to change the Default Pawn and we're going to set it to the one we just created MyPlayer  or MyPawn depending on what you named it.


We hit Save and Compile.


Go back and hit Play.


You'll see that it's starting to look right. 


My back walls a little low, so I'm going to adjust and scale it to fit the scene.


Other than the fact it's square looking it should be somewhat alright now.


We'll add a new Material and I'm going to call this Black.
Just to give some spacy feel.


We apply the material to the surfaces.

Drag the material onto the blocks.


Double Click the Material Black to jump in and edit it.


We're going to Right Click on the Base Colour and hit the Promote to Parameter.

That's going to give us a colour selector on the left, but by default it's Black so we're going to leave it.


It's kinds shiny.

So we're going to Right Click on Specular and Promote to Parameter.

That will give us a Parameter that is defaulted to 0.

Just to get rid of that shininess.

Hit Save in the top left.


So we need to hit Play again.

Well, we're back to having nothing again, but we're getting there.


Dark's Unreal Tutorial Series - Part 03 (BP) = Space Invaders Clone - Creating the Actors